Continued from the previous section on “How to Create an Event”.
Click on the “Add Action” button. This should bring up a pop up window.
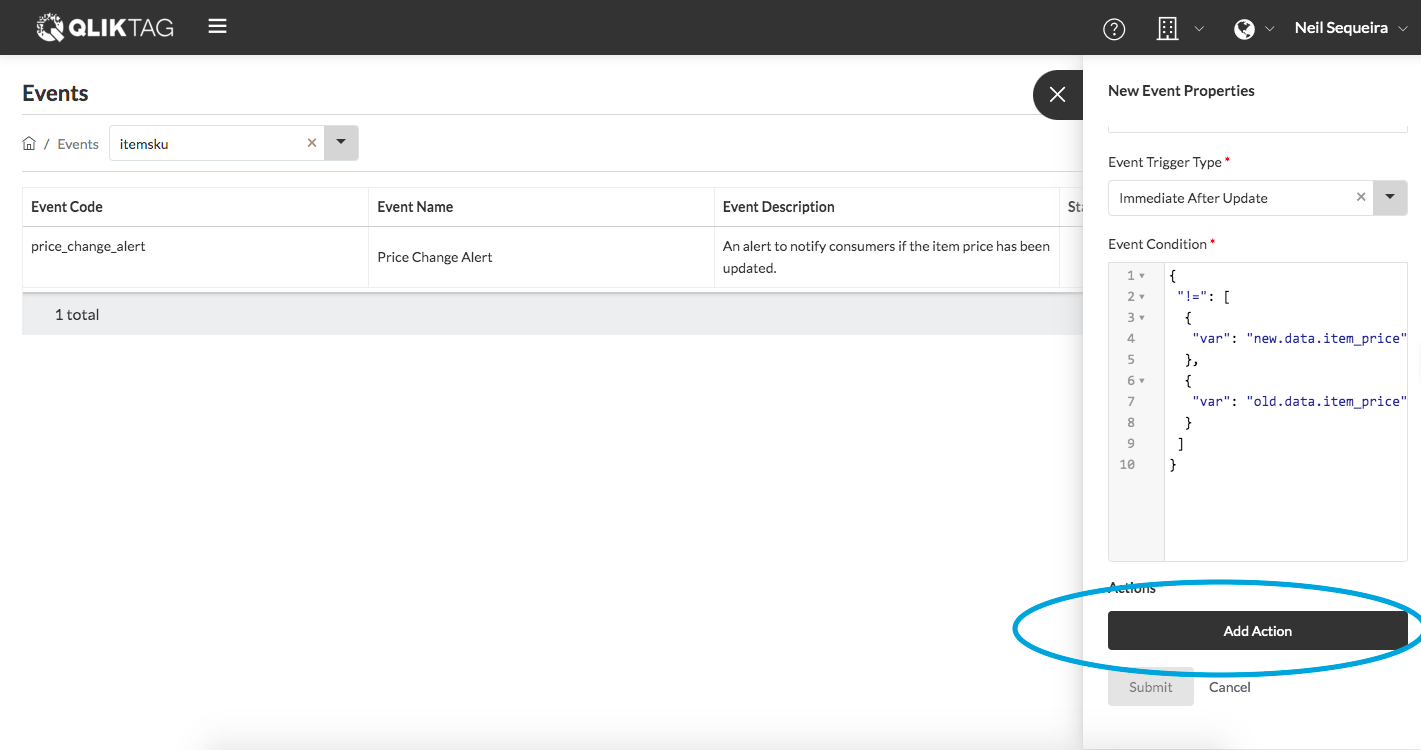
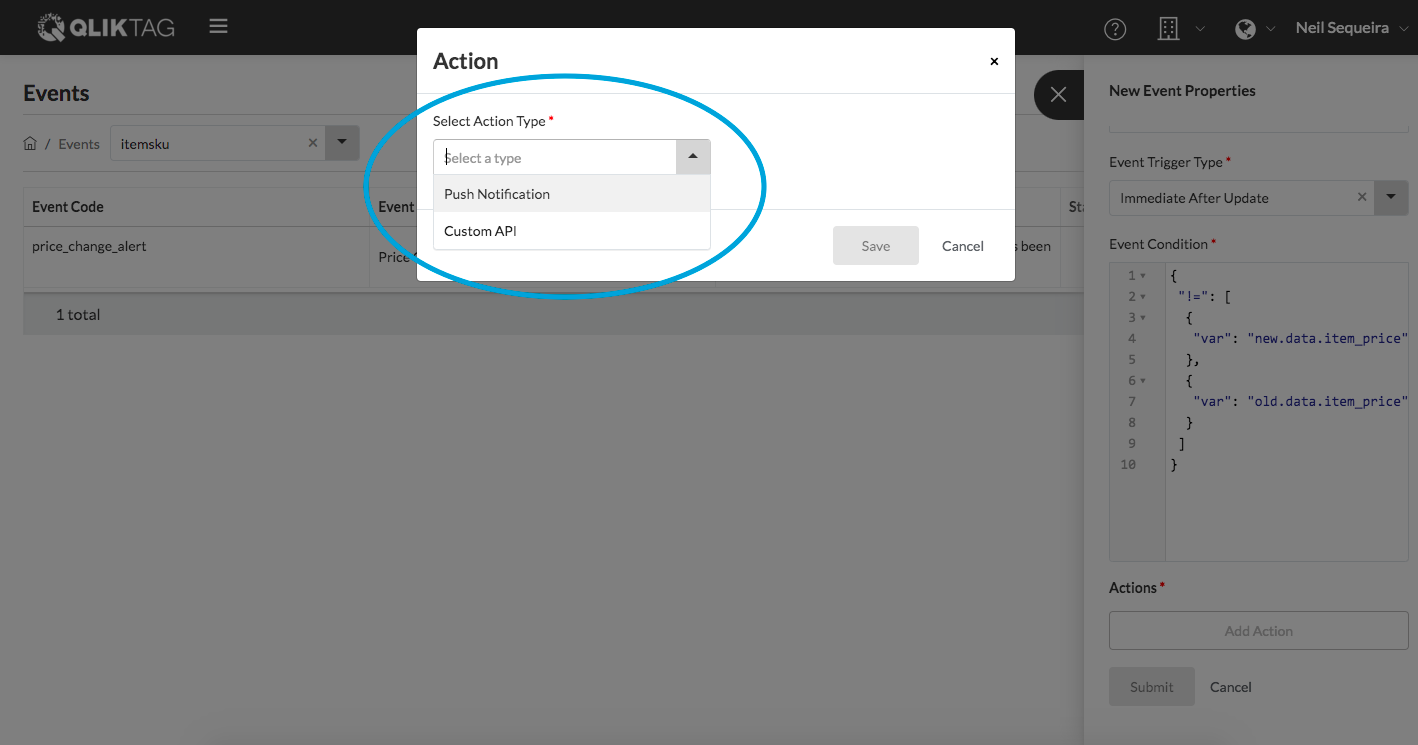
Click on the “Select Action Type” dropdown and select “Push Notification” as the type of action. Note: If you would like the action to trigger a custom API that you have created, you can select “CustomAPI” optionally.
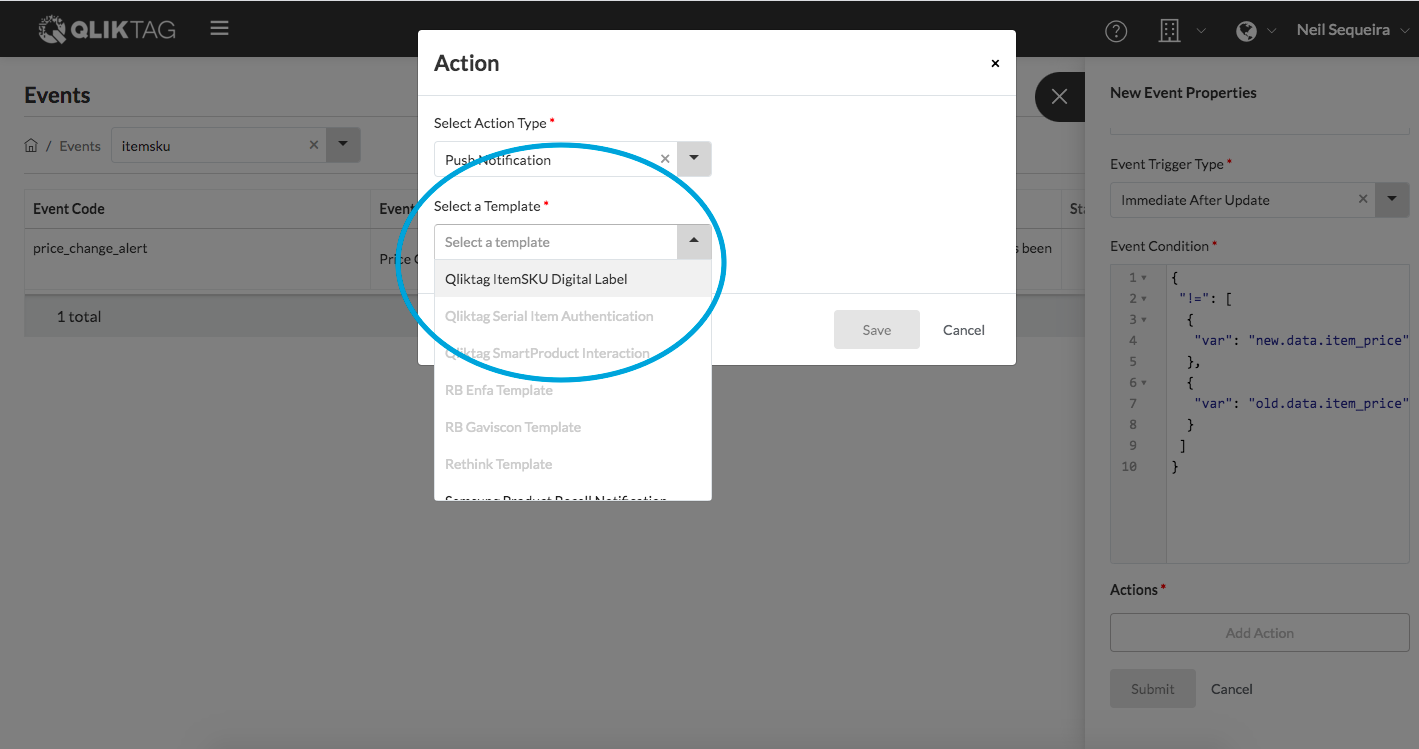
Click the “Select a Template” dropdown and select the template for which you want the notification to be created for. Note: The template must be enabled for push notifications from within the template settings prior to this step for it to appear in this dropdown.
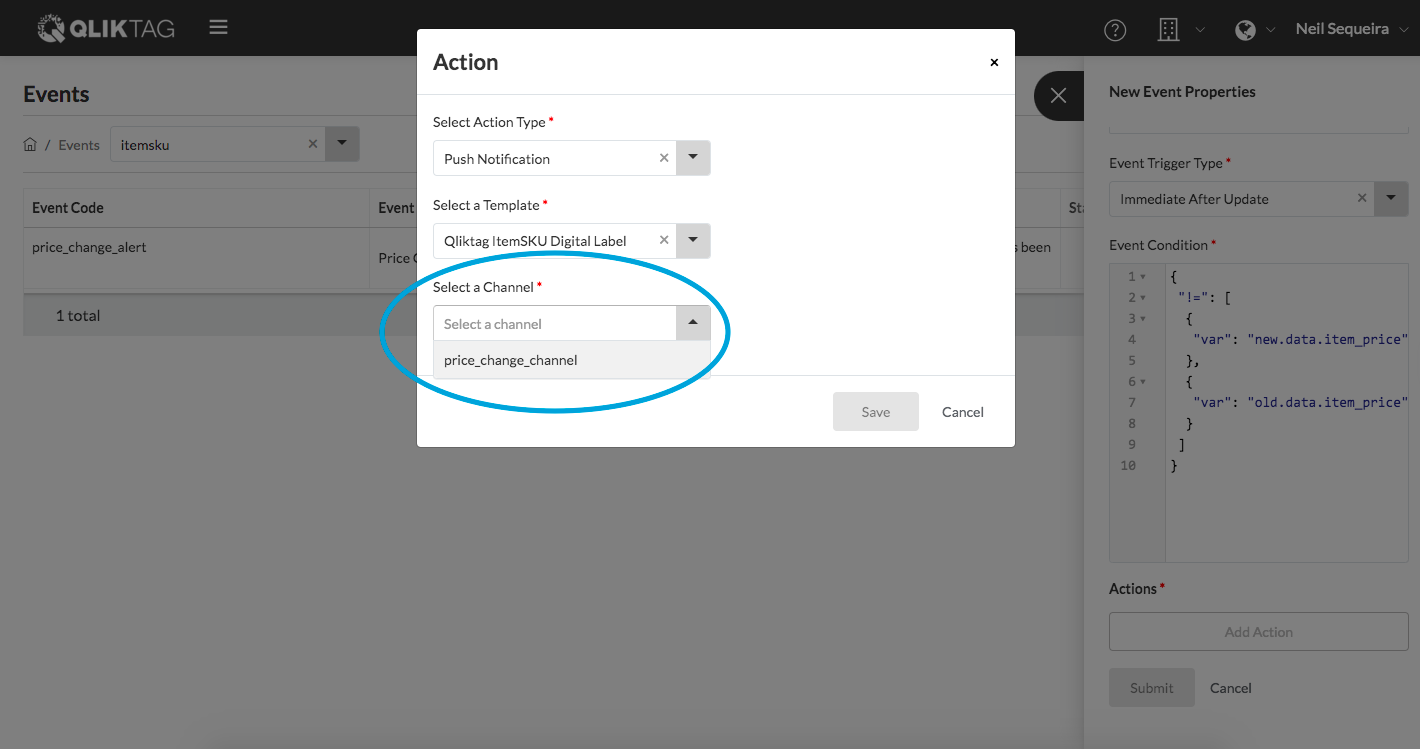
Click on the “Select a Channel” dropdown to select the notification subscriptions channel the notification will be broadcast / pushed to.
Click on the attribute selector dropdown icon to select the attribute which identified the thing.
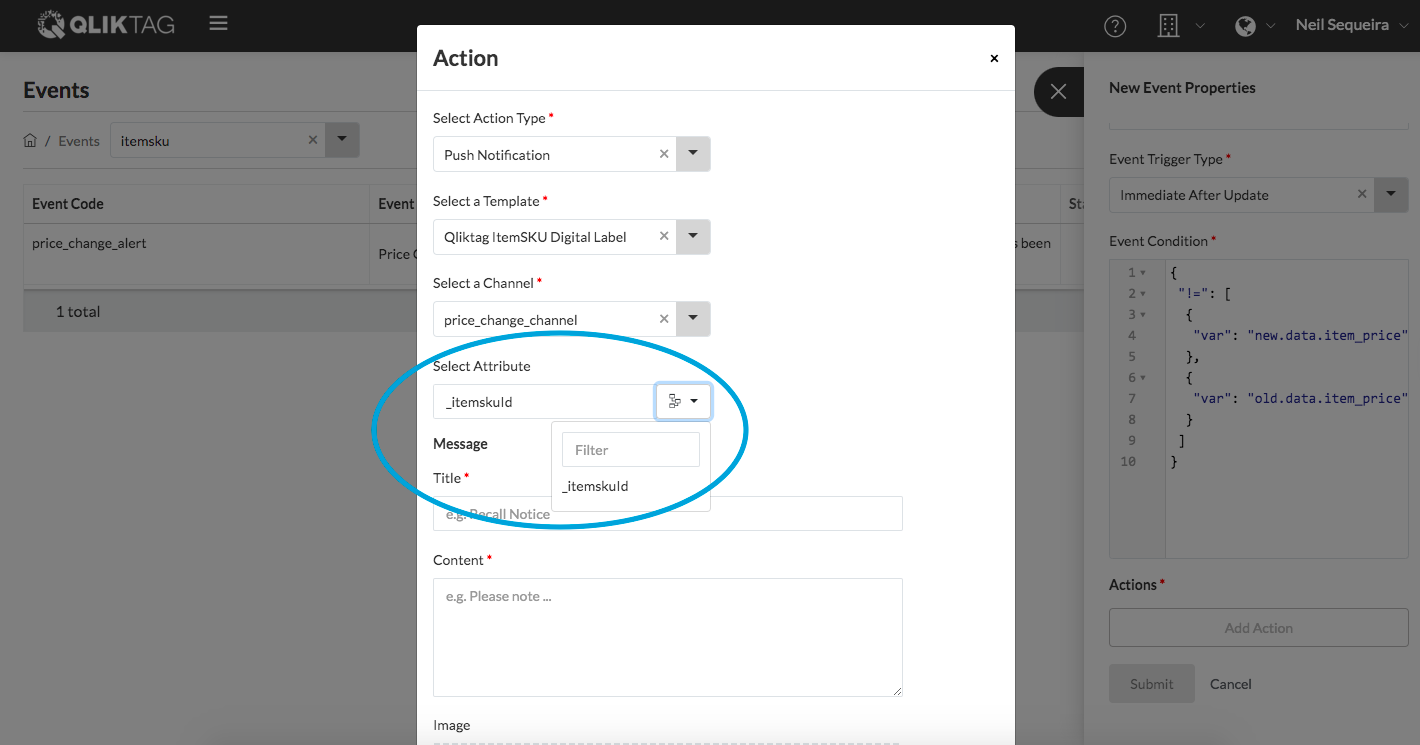
The next step would be to compose the notification. Click into the “Title” textbox and give the notification message a title.

In the “Content” section, type out the notification message content you need to convey to the end user.

In the “Image” section you can add an image by dragging and dropping a file into the box or browsing and selecting the image file from your device. This is the image that will appear in the push notification along with the content.
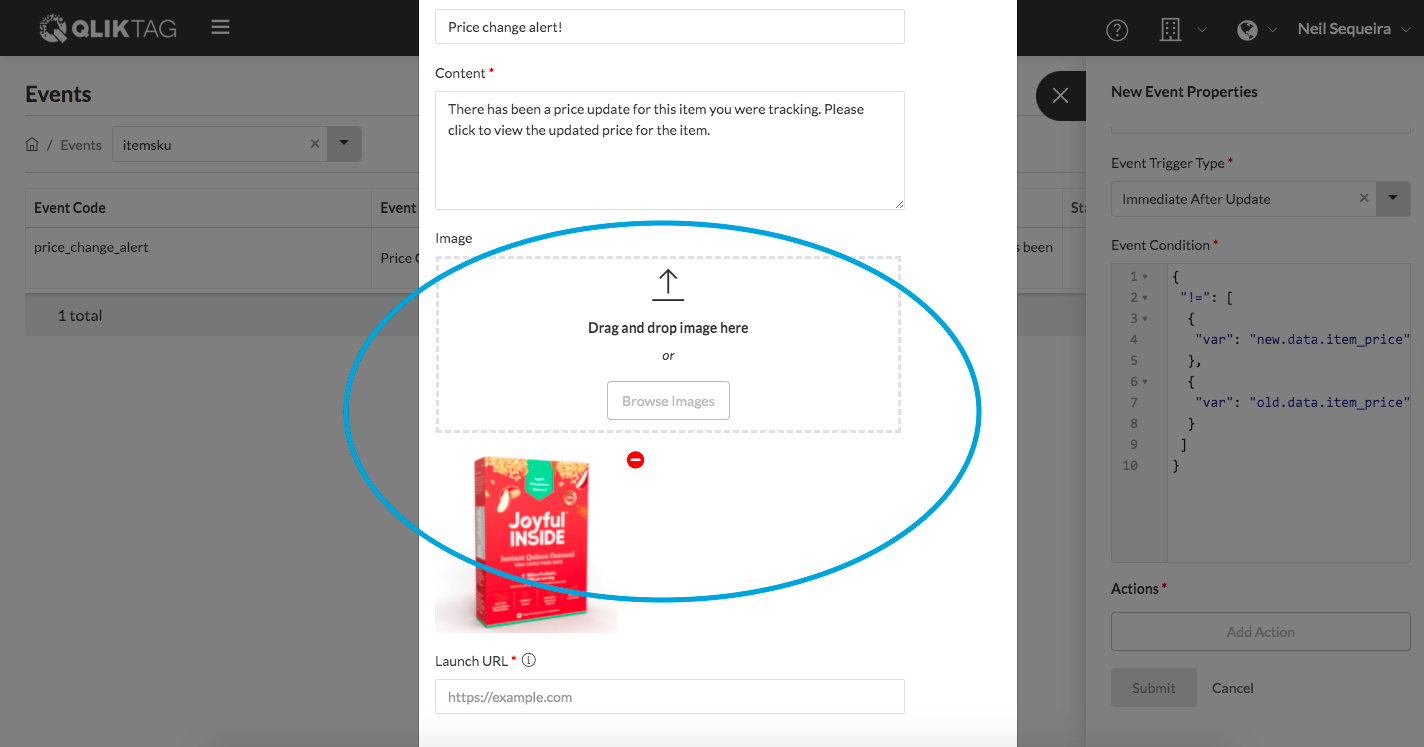
Click into the “Launch URL” field and add the URL of the page you would like to direct the end user to once they click on the notification.
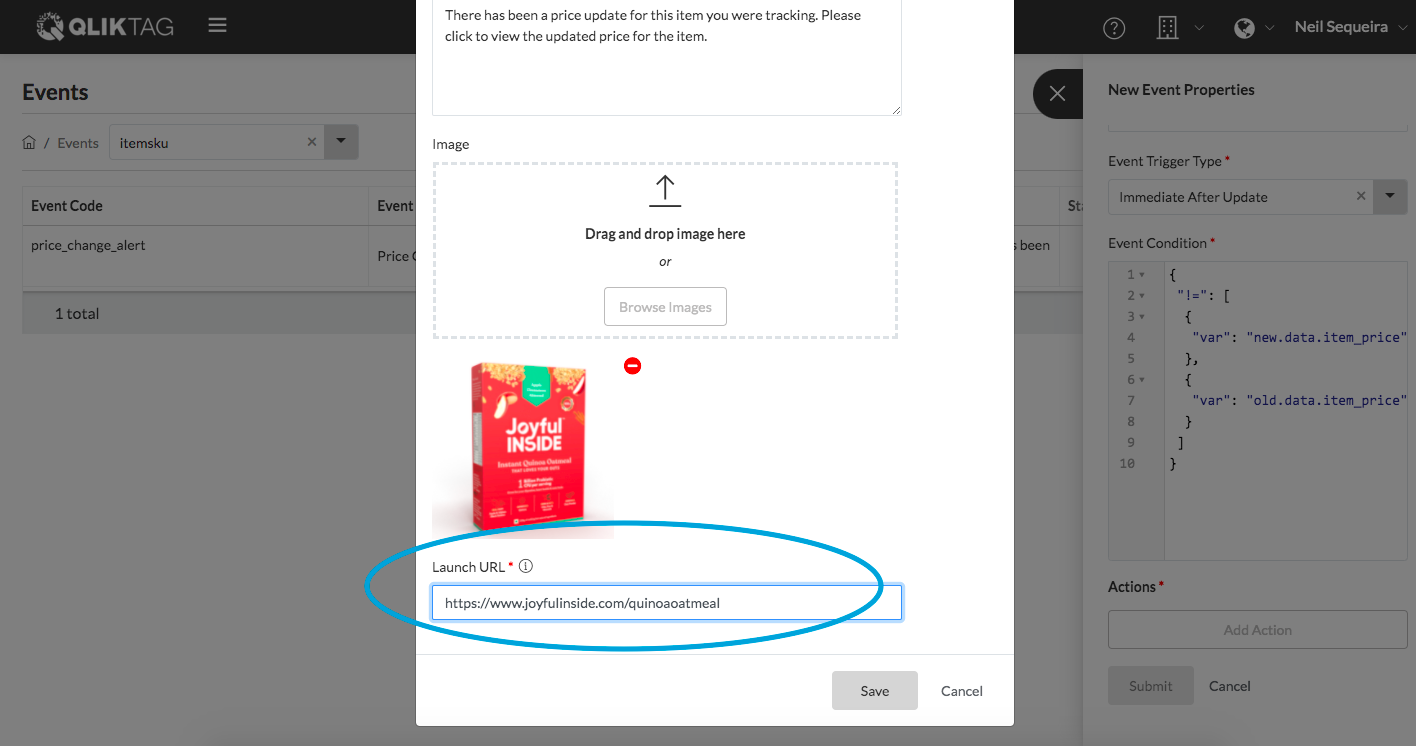
Click “Save” to complete the process and save all the settings.

This should complete the setup process. In this use case, if the list price value of a “Thing” is updated and saved, this event should instantly trigger a push notification to all those who have invoked a digital interaction for this item and subscribed to push notifications. On a smartphone, the end user would receive a notification even if the browser is closed and the phone is not in use.