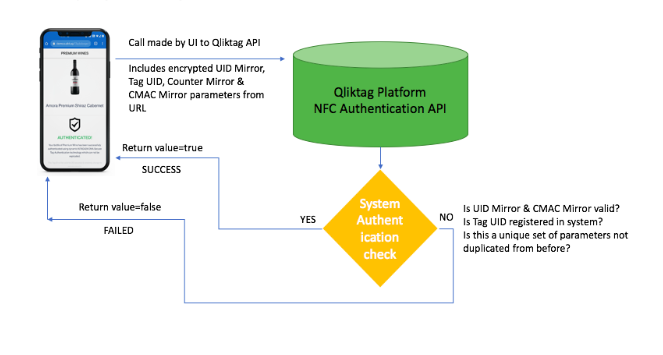
Below is the process flow for the use of NXP NTAG 424 DNA Secure NFC tags placed on items with the Qliktag Platform:
STEP 1.
The user taps the NTAG 424 DNA NFC tag with an NFC enabled Android Phone or iPhone natively without the need to download any additional app.

STEP 2.
The PICC “Proximity Integrated Circuit Card” within the 424 DNA Tag on tap generates:

UID Mirror
This is a 14 digit dynamically generated ID which randomly changes on each tap of the NFC.
NFC Counter Mirror
This is a multi digit number attribute which serves as a counter to keep an incremental record of the times the tag is tapped.
CMAC Mirror
Hardware device ID or MAC generated by the tag. This is 16 digits.
Note: All mirrored content is dynamic data which replaces static placeholders eg. 000000
STEP 3.
In addition to these 3 dynamic parameters, a 4th static parameter is also available within the tag.

Tag UID
This is a 14 digit static ID unique to each NFC tag and used to identify that specific individual physical tag.
STEP 4.
When the Qliktag generated web interaction / landing page opens within the phone browser which includes the URL encoded parameters, a component within the UI reads these parameters from the URL, and passes these to the backend API over ‘https’ for validation.

STEP 5.
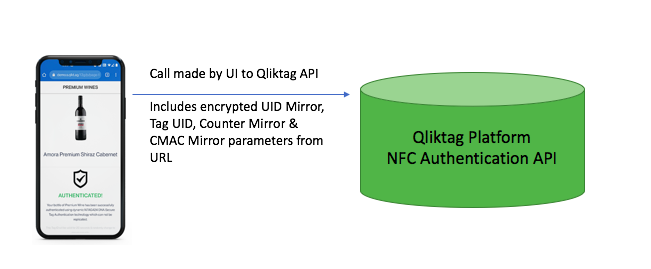
The UI component then makes a call to the Qliktag Platform ‘NFC authentication API’ along with the query parameters read from the URL.
STEP 6.
The system decrypts the parameters received from the API, internally authenticates the UID Mirror, CMAC Mirror & the Tag UID (if enabled) & the Tag UID is recorded against that specific serial item within the system. It also checks the Counter Mirror to validate if this unique combination of UID Mirror, Tag UID and CMAC Mirror have been used or received by the system before and may have been duplicated.
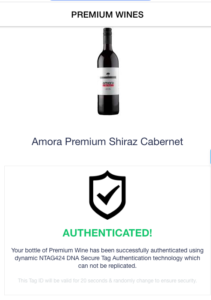
If all the parameters have been validated by the system check + this combination of UID Mirror and have not been received in the past + the Tag UID matches the Tag ID stored for this specific serial item within the system, then the authentication is successful and the API returns a “true” value to the UI component within the web interaction / landing page.
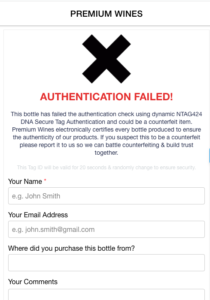
If any of these conditions fails, then the API returns a “false” value to the UI component in the landing page indicating authentication has failed.
STEP 7.
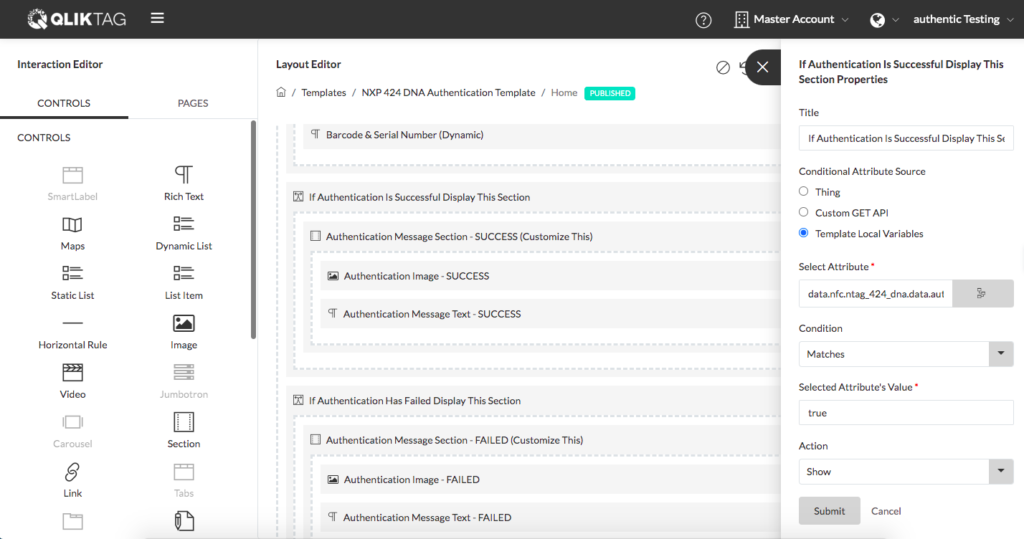
The “Conditional” control within the template of the web interaction / landing page will read the response value and either “show” or “hide” content placed within this section like images, text, forms based on how it has been set up in the template designer. This will convey to the user whether the tag authentication was successful or has failed.
