The “Digital Interaction Template” determines the design and user interface a consumer will see when they use their smartphones to tap a NTAG 424 DNA tag to authenticate an item. As part of the “Item Authentication & Anti-counterfeit” configuration you have installed, a working “Template” has been created and pre-installed for you specifically to work with these tags. However, you can choose to edit and customize the template to incorporate your own message to users when product authentication has succeeded or failed. You can also edit the template to add your own branding, additional product information, content and experiences on top of the authentication use case to enhance the experience and go beyond.
Note: This next part of the process of editing & customzing the Digital Interaction Template is optional. If you’re looking to encode and test a single NFC tag with the existing template provided and don’t want to incorporate your branding and customizations at this stage, you can skip this section on customizing the digital interaction template.
Here is the process to edit and customize your “Digital Interaction Template” and user experience:
Click on the hamburger menu icon in the top right corner of the screen to navigate to the main menu.
Click on the menu item “Visual Interaction Templates”
In the main Templates section, you should see a Template pre-loaded by the name “NXP 424 DNA Authentication Template”. Click the pencil icon to “edit” this template.
This will bring up the “Interaction Editor” screen and allow you to edit or customize the template. On the left the drag and drop controls appear. In the center, the layout and components dragged into the template design. On a smaller laptop screen you will have to use the tab highlighted to pull out and view the mobile preview of the template which will appear on the right of the screen.
The brand name, product name, product image, barcode number have been set up using shortcodes to dynamically display from the product SKU entity.
To learn more about creating templates, please refer to the documentation on “Digital Interaction Templates”.
To learn more about configuring “NFC Tag Authentication” for templates, please refer to the documentation on “Enabling NFC Authentication Services for a Template”
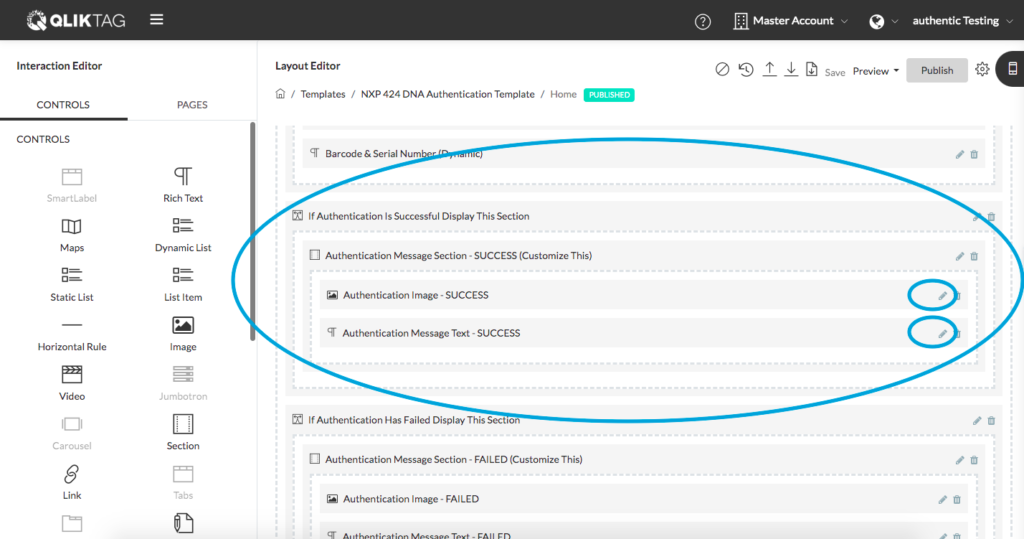
To edit the message that appears when an item and tag have been successfully authenticated, the following are the components you will want to edit. I.e. The” Authentication Image – SUCCESS” component to determine what image or icon to display on successful authentication and “Authentication Message Text – SUCCESS”. Click on the pencil icon to edit these properties.
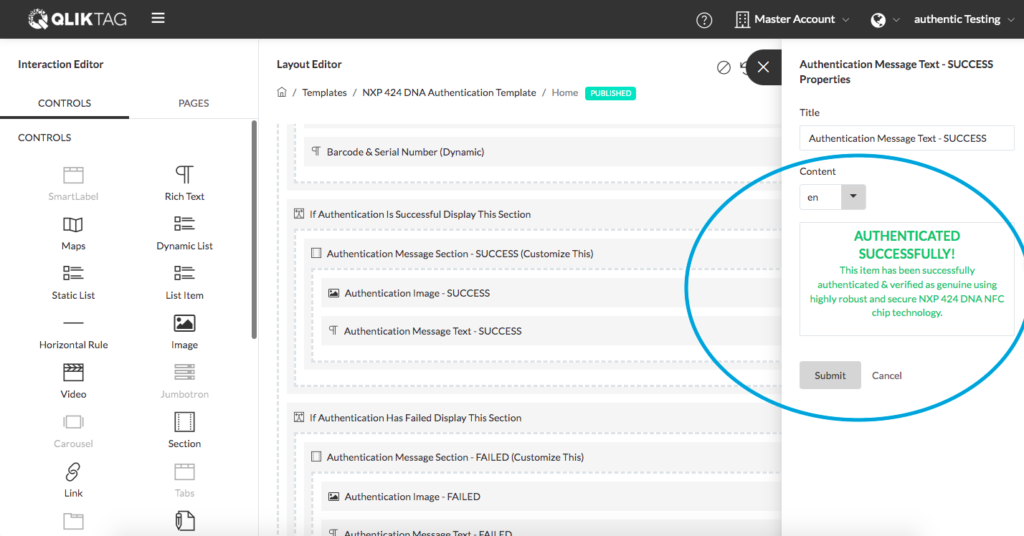
To change the text that appears when a tag and item has been successfully authenticated, this text can be edited.
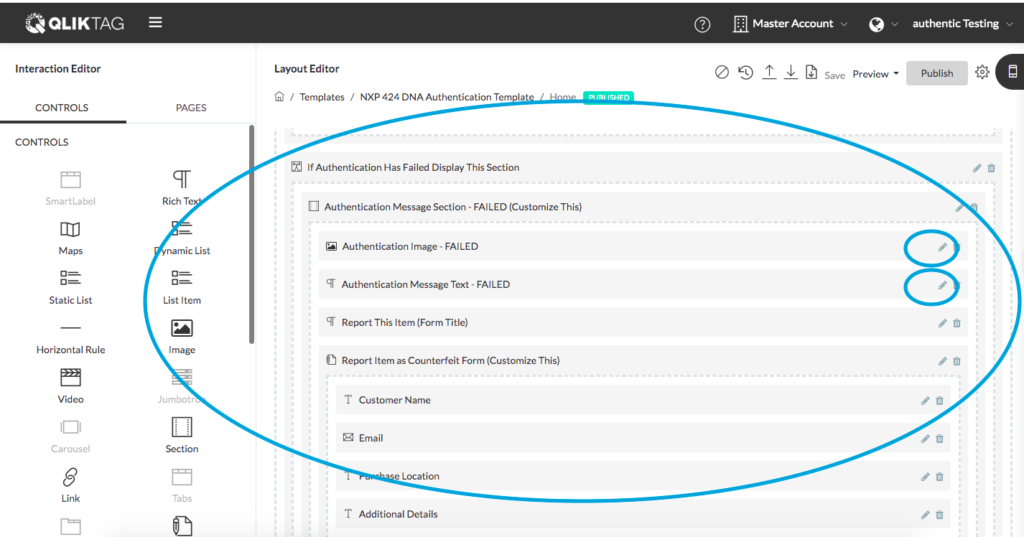
Similarly, to edit the components that appear when a tag / item has failed authentication, you can edit and customize the components here:
For more information on feedback forms used in this section, please refer to the documentation on “Overview of Controls”->Forms->Form Controls.
Once the edits to the template have been completed, first click the template “Save” button to save your changes. Then, click the “Publish” button to publish the new version of the template and make the changes live.
Next Chapter>>


