To create a NFC authentication digital interaction, the Qliktag Platform has integrated direct support within the template for secure NFC tags specifically engineered for authentication and anti-counterfeiting solutions. This feature presently supports NXP NTAG 424 DNA Secure NFC Tags and HID Trusted Tag® a trusted tag NFC technology by HID Global.
These specific models of NFC tags are unique in that they generate a new dynamic random code or ID every time they are tapped with a smartphone and this dynamically generated code can be encrypted and authenticated with a special service much like an electronic key fob device used for online banking and generates a one-time passcode. In case of HID Trusted Tag® this service is provided by an authentication service provided by HID Global through an external authentication server. In case of NXP NTAG 424 DNA Secure NFC Tags, the authentication service is provided by the Qliktag Platform and integrated directly with the platform.
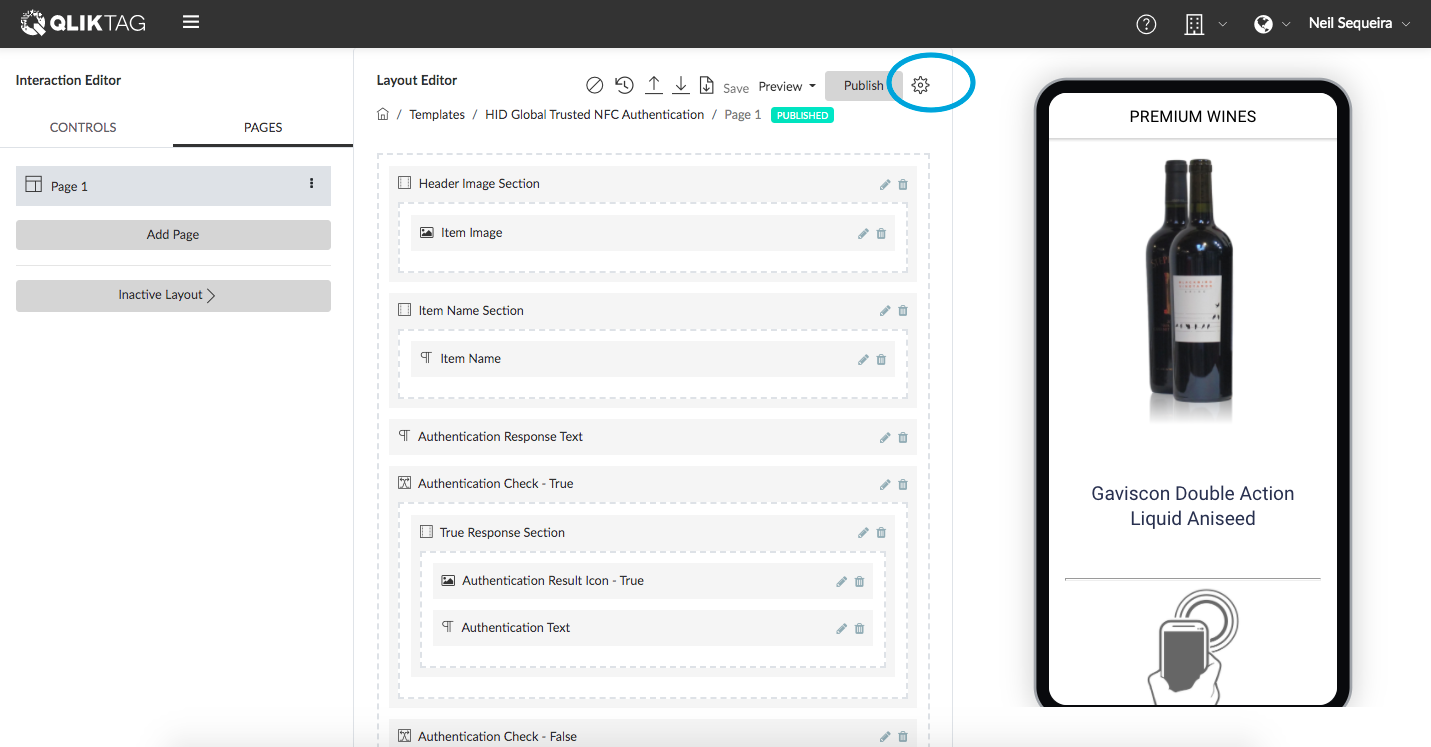
To enable NFC authentication for any visual interaction template, click on the “Update Template” settings icon to access the template settings.
Click on the “Advanced” tab to navigate to the advanced settings for the template.

Under the “NFC Authentication” settings option, switch on the toggle switch to “Enable NFC Authentication”.
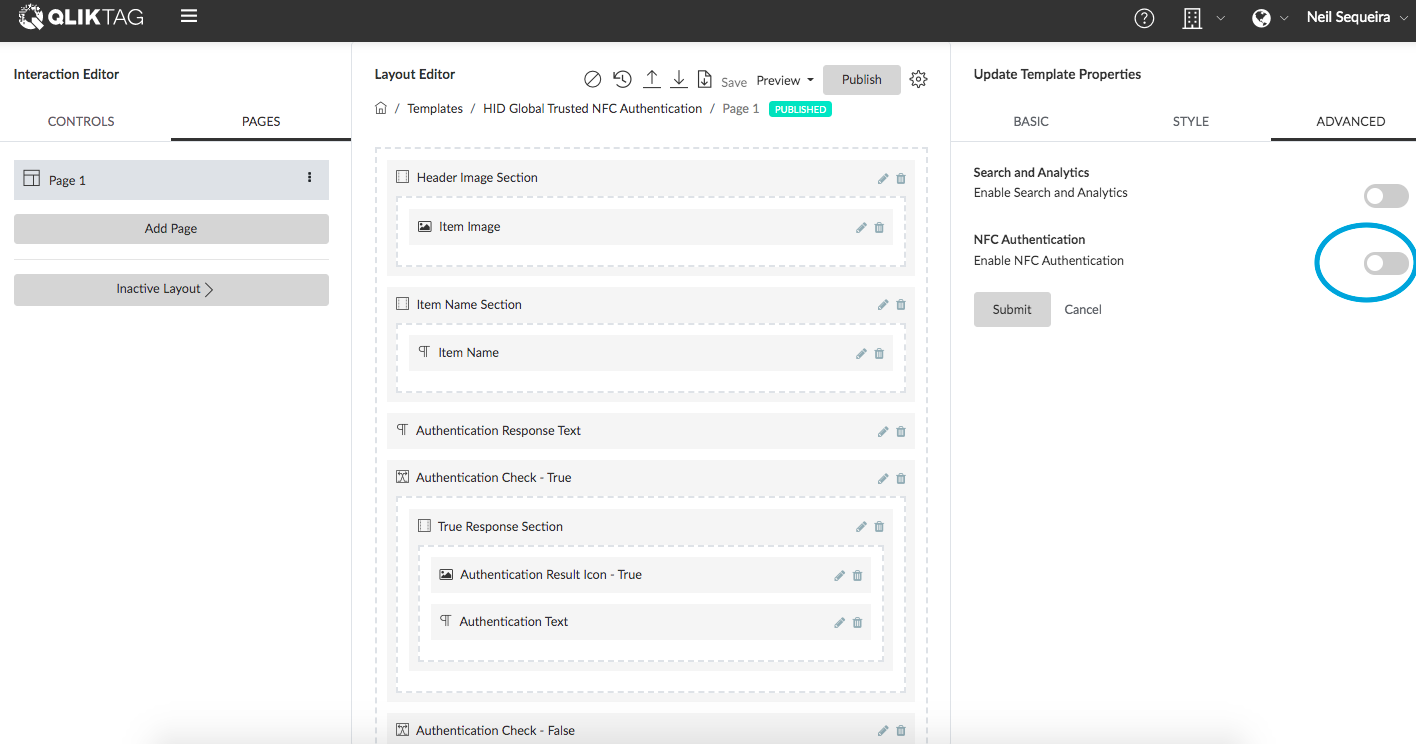
To configure for the ID Trusted Tag®, under the “Tag Type” dropdown, select “HID Global Trusted NFC”.
Enter the “Username” as provided to you by HID Global. Enter the “Password” as provided to you by HID Global for the authentication service. Enter the “Cloud Authentication URL” as provided to you by HID Global. Click on Submit to save your settings and end the configuration setup.

To configure for the NXP NTAG 424 DNA Secure NFC Tags, under the “Tag Type” dropdown, select “NXP NTAG 424 DNA
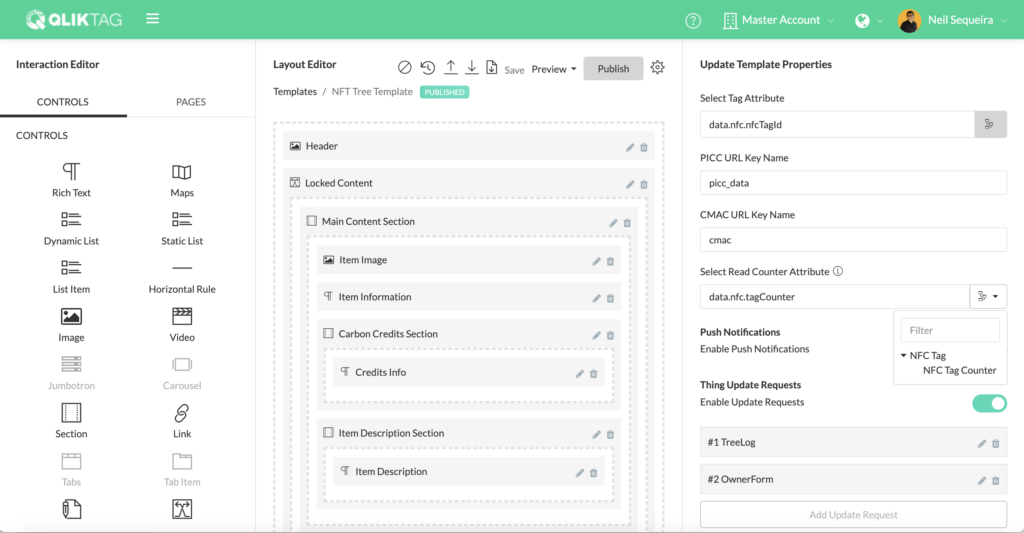
Click on the “Select Tag Attribute” option to select the attribute from within your data model that you have used to register the individual NFC tag IDs against your individual “Things” or items. (For example you may have an attribute called NFC Tag ID created within your data model to write and store the tag IDs of individual tags so each tag is registered against a thing within the system). Note: this can be left blank if you haven’t registered individual tags to Things however, it’s highly recommended you do to ensure a more secure authentication solution.
Under PICC URL Key Name enter a key that will appear within the URL to identify the PICC data within the URL. For example : picc_data.
Under CMA URL Key Name enter a key that will appear within the URL to identify the CMAC data within the URL. For example : cmac.
The NFC Tag Counter attribute is an optional security feature which is used to keep a log of the tag counter reading each time an NFC tag is tapped. Every time the NFC tag is tapped, there is a tag counter within the NFC tag which increments the counter value by one. If this feature is enabled, the system will read the counter value on each tap, grab that counter value from the tag and store it within an attribute in the “Thing” instance associated with the tag. If a tag on an item is scanned without an internet connection and the link generated with PICC data is copied before it is sent to the Qliktag server for authentication, it can be used at a later time without the tag or physical item. To prevent stolen links, if the NFC Tag Counter feature is enabled, it will check to see if the tag counter reading is greater than the last scanned counter reading stored at the last scan and if it is less than the last counter reading stored, the scan will fail authentication and return a response that indicates it is not authentic. Only a fresh scan with the physical tag will authenticate.
To enable the NFC Tag Counter feature, first ensure your Entity Data Model has an attribute to store the “NFC Tag Counter Value”. If it does not, please create an attribute to store the counter value that is of Number data type or Integer data types only. Then within the Advanced Template Settings, select the setting “Select Read Counter Attribute” and click the drop down. The field created for NFC Tag Counter should appear within the drop down if it is a numeric or integer type field. Select that attribute and the shortcode for that field should appear in the box indicating the field has been mapped and the system knows where to store the tag counter value on each scan.
Click on Submit to save your settings and end the configuration setup.
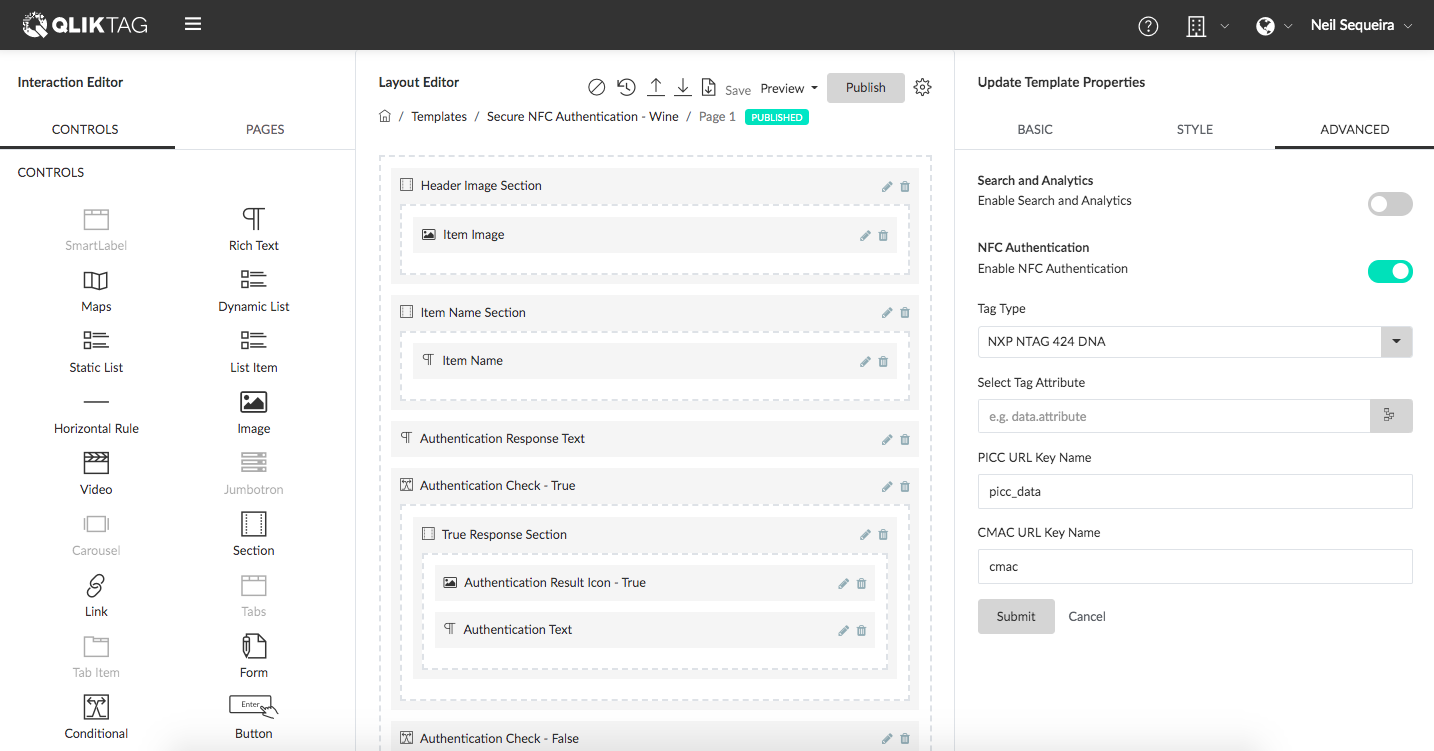
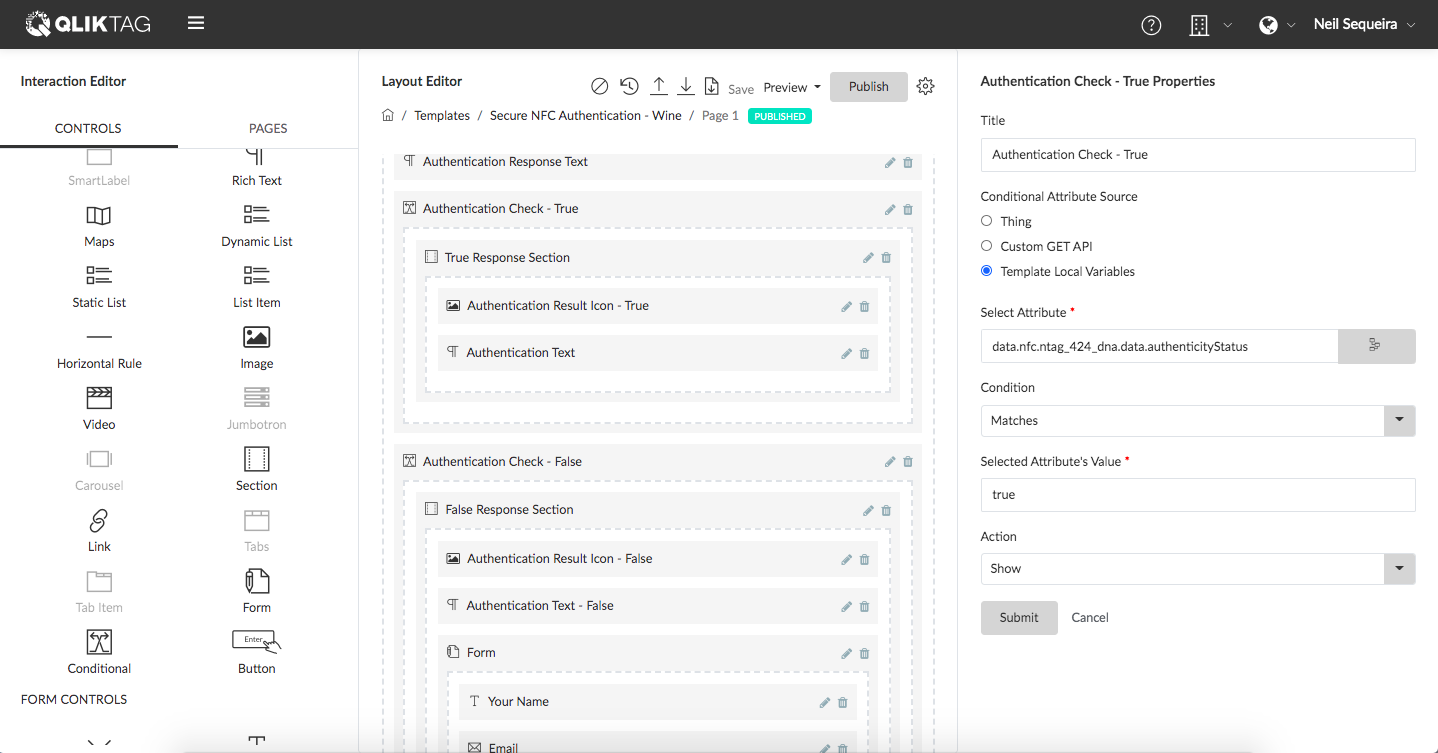
Finally, in order to read the message sent back by the authentication service and display an appropriate message to the user after the NFC tag has been tapped with a device, a “Conditional Control” can be dragged into the template and configured to display some text and content if the authentication has “passed” the check. A second “Conditional Control” can be dragged to display content in case the authentication has “failed” the check.
To configure the “Conditional” control, give it a “Title” for example “Authentication Check – True”. Under the setting “Conditional Attribute Source” select “Template Local Variables” option.
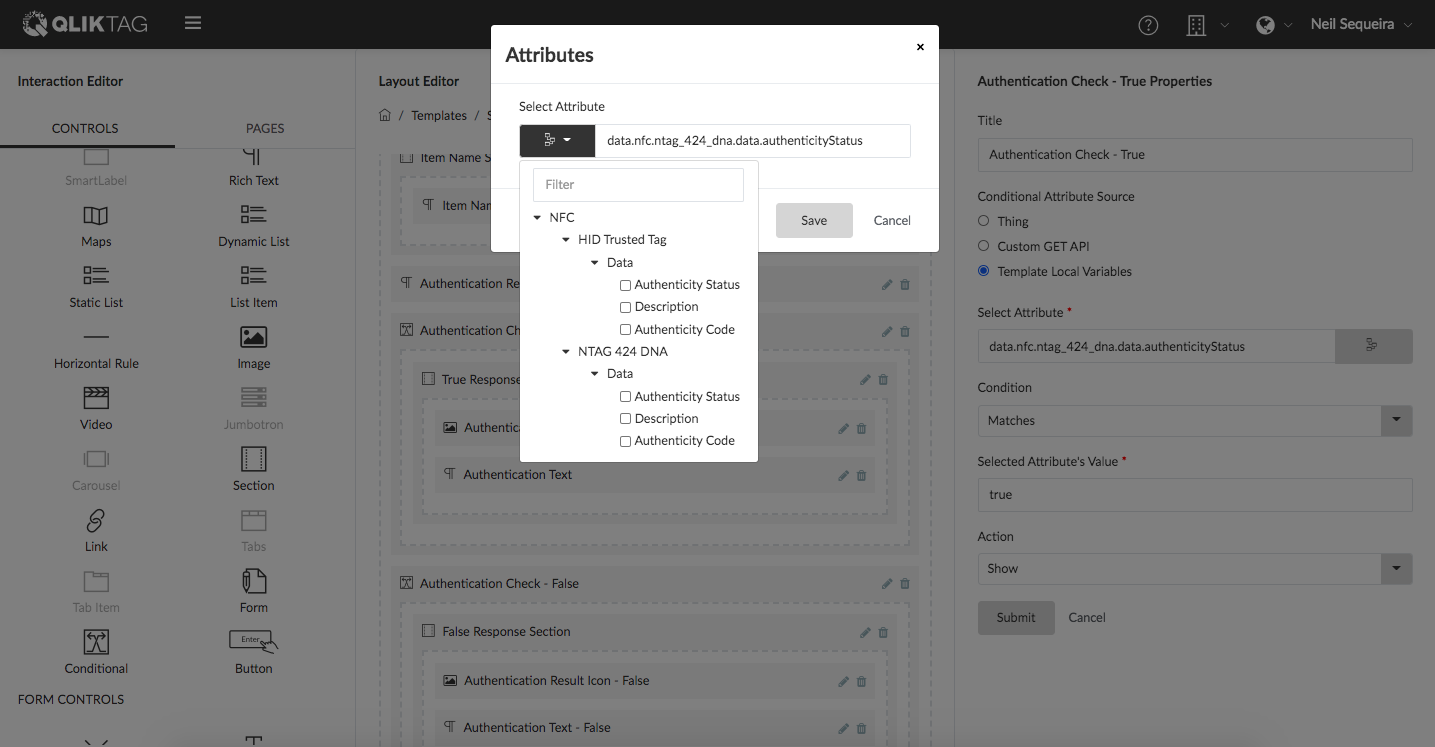
Under the “Select Attribute” setting, select the “Authenticity Status” attribute from under the HID Trusted NFC Tag or the NXP 424 DNA Tag data tree depending on which type of tag you are using and configuring for.
Under the “Condition” dropdown, select “Matches”
Under “Select Attributes Value”, enter “true”. (This is because we want the control to appear only if the authentication has passed and the value returned is true. If you wish for the conditional control to appear when the authentication fails enter “false” here)
Under “Action” select the option “Show”. (This is because we want everything that placed inside this conditional control to show if the au authentication status returned is true and it has passed the authentication check.)
Click Submit to save your settings.
