Registering the NFC Tag UID against each serial item within the platform is an essential part of the overall authentication solution. It prevents a counterfeiter from potentially purchasing NTAG 424 DNA tags and copying the solution as only tags registered within the platform will be authenticated and unregistered tags will fail.
For this reason, you will need to register the UID of the tag you have just encoded for it to successfully authenticate.
Step 1
On your smartphone, go to Google Playstore and search for and install the app “uCreate NFC” by Identiv Inc.

Step 2.
Ensure NFC is enabled on your phone and open the uCreate NFC app on your device.

Step 3.
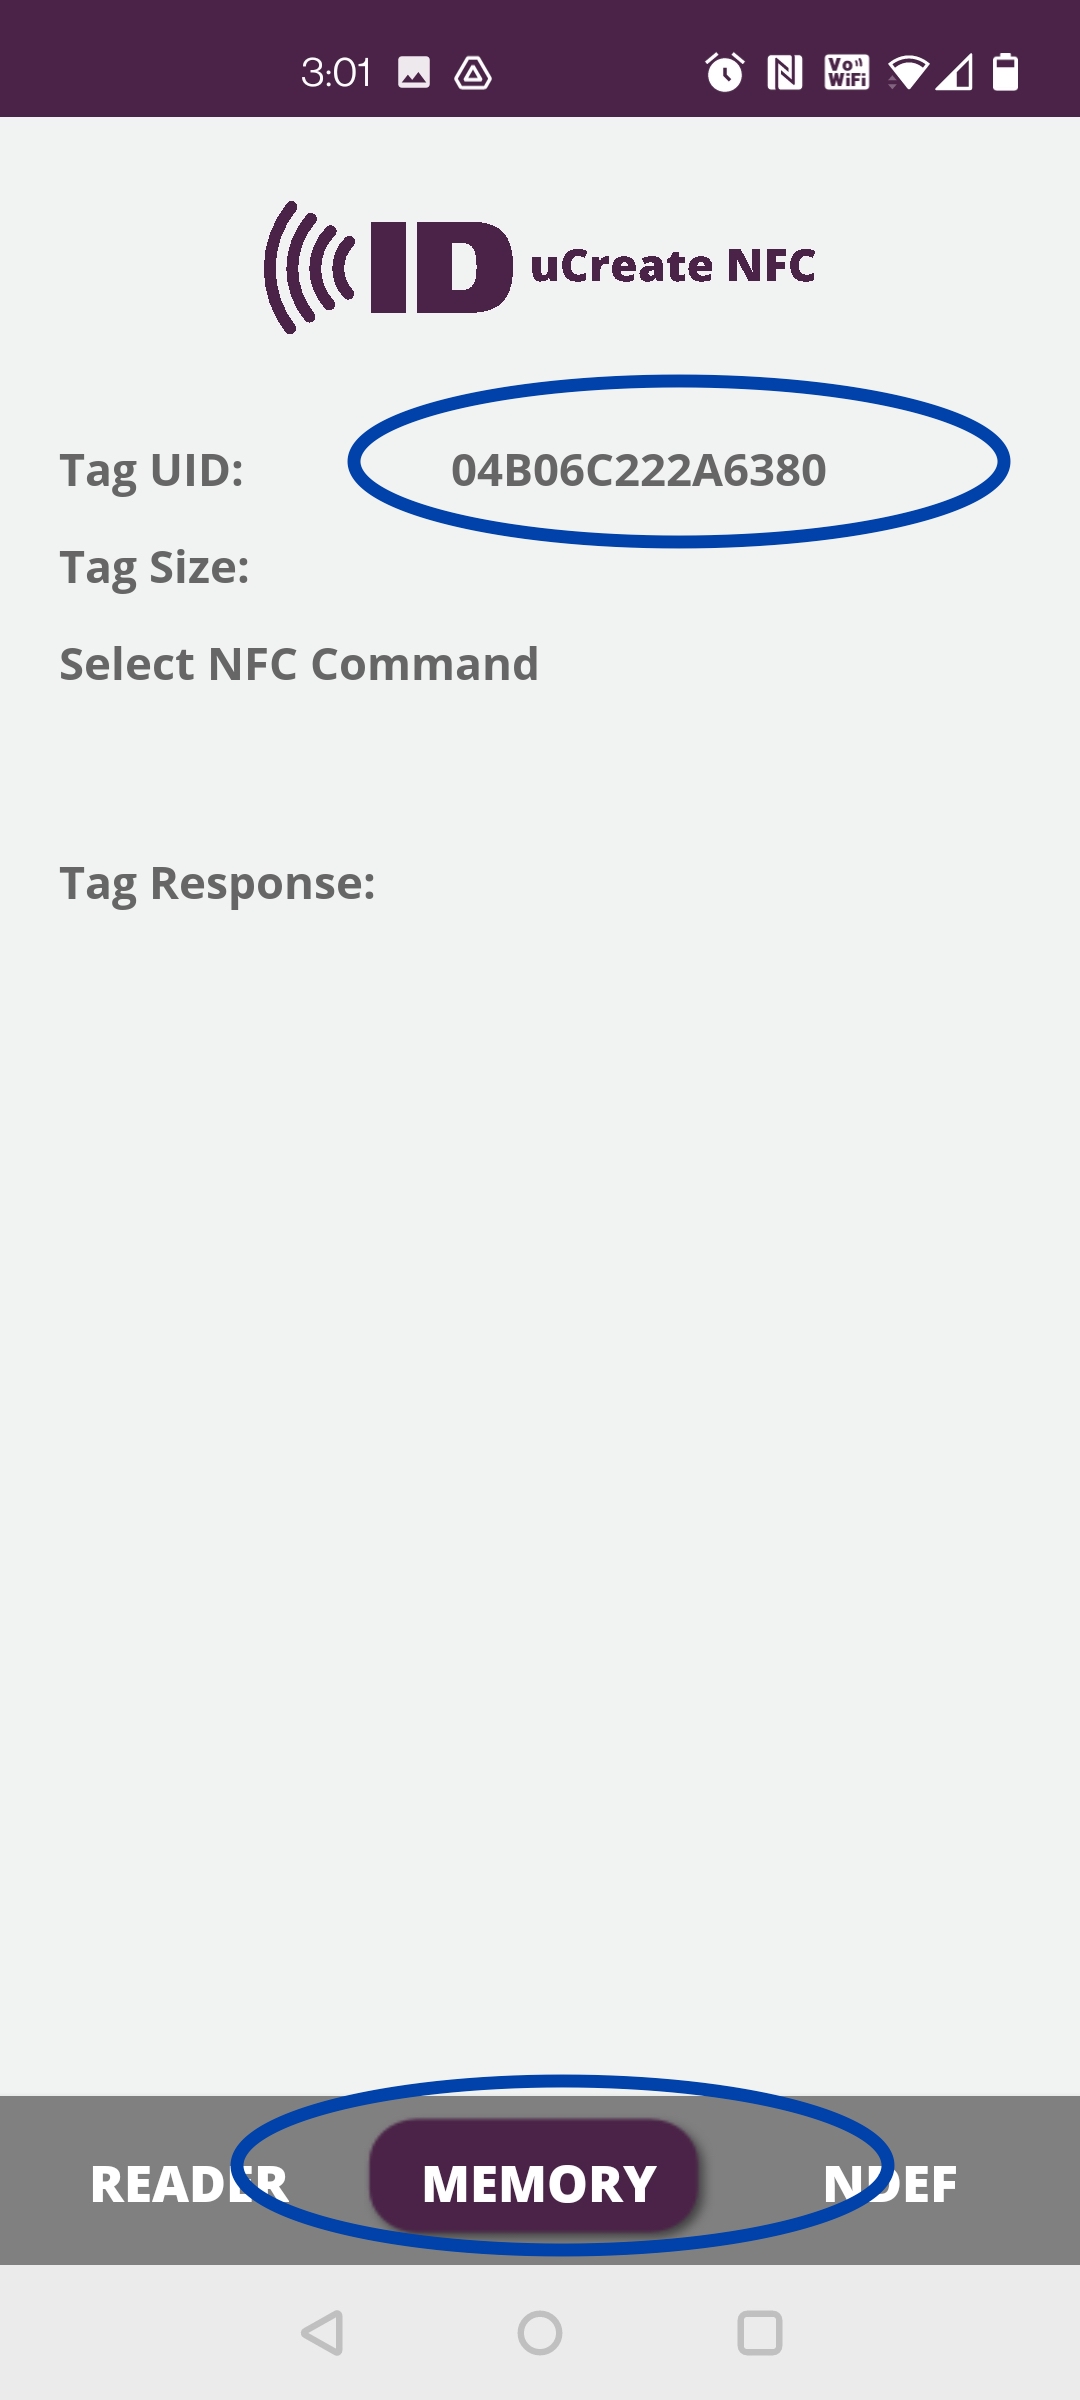
Place the tag on a surface and hold your phone over the NFC tag to tap it. You should hear a sound when the tag has been successfully detected and read. When the tag is read, you will see the “Tag UID” at the top. It’s a 14 digit ID with numbers and letters. This is the UID that you will want to copy and save somewhere. If you click on the “Memory” tab, the UID will display there as well.
Step 4.
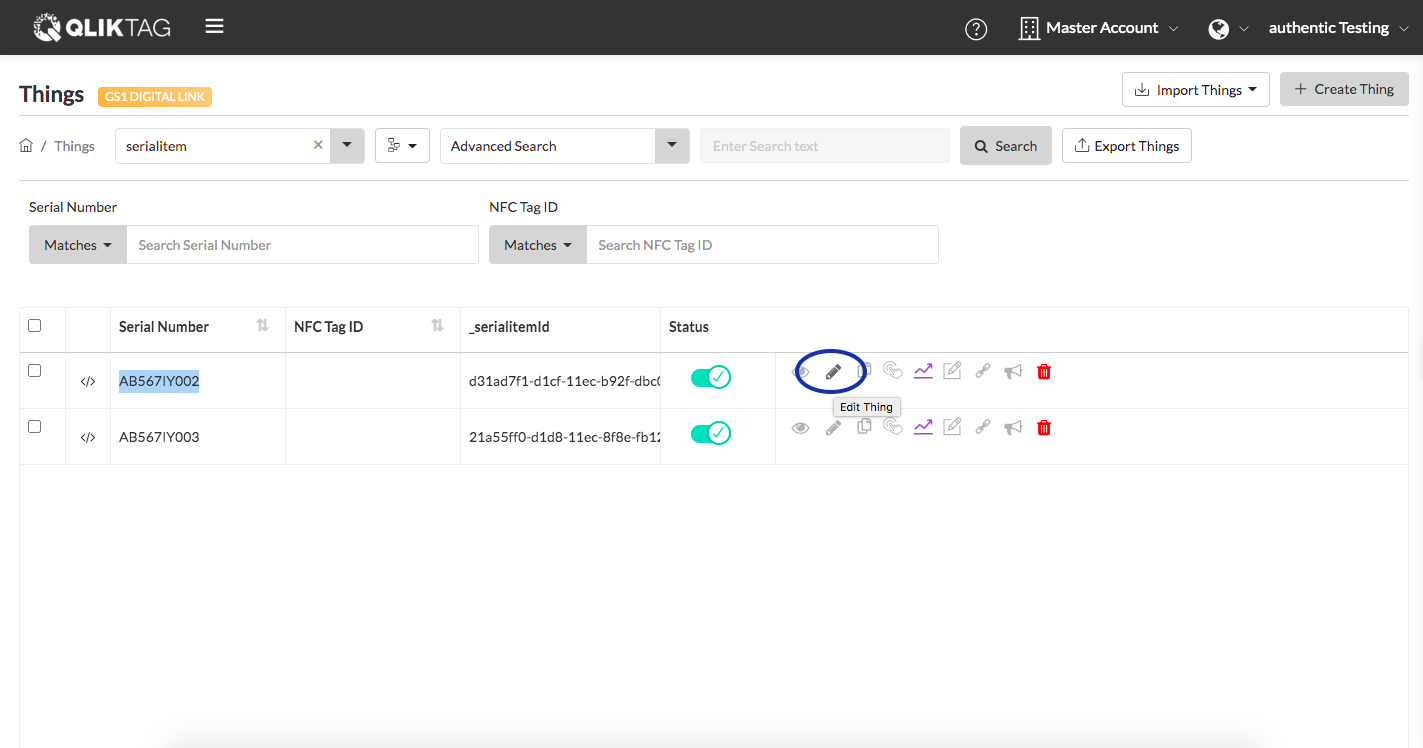
Once you’ve copied the UID value, close the uCreate NFC app. On your laptop or computer, login to your account on the Qliktag Platform. Navigate to the “Things” section in the main menu. Make sure the “serialitem” entity is selected from the dropdown.

Step 5
For the Serial Item with serial number AB567IY002, click on the pencil icon to “Edit” the thing.
Step 6
Paste the UID you copied earlier into the NFC Tag ID field and then click the “Save & Exit” button to save your changes.

The tag has now been registered against the serial item!